


 24/7 Emergency Service
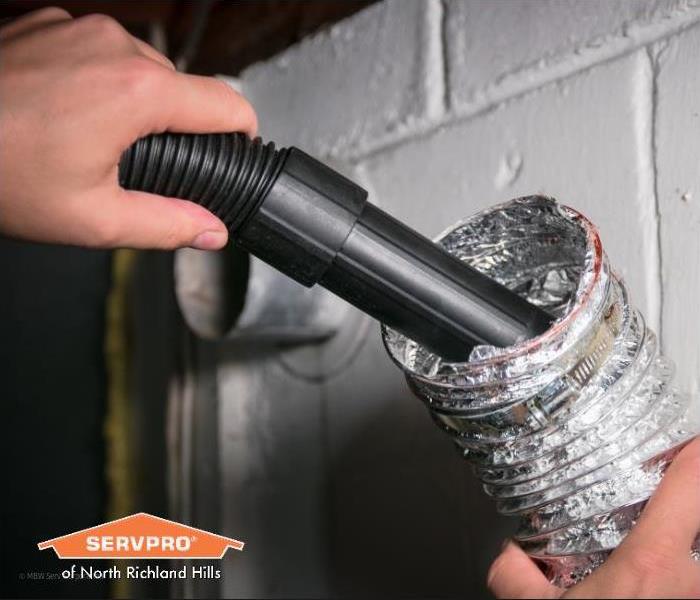
How to Clean a Clogged Dryer Vent
12/4/2020 (Permalink)
 Prevent a fire in your home - contact SERVPRO in Fort Worth for professional cleaning of your clogged dryer vents.
Clothes dryers work overtime when you spend the whole day getting caught up on laundry. Doing several loads of laundry in a row may uncover issues with the appliance.
If you find that your clothes need more time to dry than usual, the dryer is hot to the touch, the laundry is very hot after being removed from the dryer, or even a burning smell these are all signs of a dryer problem that could be related to a clogged dryer vent.
SERVPRO of Fort Worth is committed to public safety. As a major Fort Worth fire damage restoration company, we’ve seen much fire damage that could have been prevented.
Clothes dryers are the culprit of thousands of house fires annually. Today, we’ll share some tips on how to keep your dryer vent clean and clear so you can mitigate the risk of fire damage to your home.
What Happens When the Dryer Vent is Blocked?
Dryer exhaust vent blockage occurs when hot air cannot escape as designed. Dryers generate a lot of heat, so for the dryer to work properly there must be a way for this excess to escape.
Aside from being a common cause of house fires, a blocked dryer vent causes the appliance to run inefficiently and could incur higher energy costs.
Reasons Dryer Vents Get Clogged
So how does a dryer go from normal to overheating and under drying? Below are the common causes of a clogged dryer vent.
Mechanical: Such as a kink in the vent duct or a stuck vent flap/blocked vent cover. Lint can get caught on sharp corners.
Natural: If a rodent or a bird creates a nest in the duct, this causes a blockage.
Accumulation: Lint traps collect all the excess lint for easy removal. Lint that escapes or other debris builds up in the duct/vent over time. Residue from fabric softener sheets may also contribute to this. If your lint screen is damaged or if you have forgotten to remove the lint from the trap, this could be your problem.
Remember to clean out your lint trap before each use.
If you’ve ruled out a mechanical issue, we’ll guide you through how to unclog and clean out a blocked dryer vent.
How to Clean a Dryer Vent
Before you do anything to your dryer, consult your product warranty. Make sure that none of the actions involved in the dryer vent cleaning will void your warranty. You may need to have an authorized repair service come out to clean your vents depending on your warranty details.
If your setup is complex, or you think your ventilation wasn’t set up correctly, you might consider calling a professional.
For a thorough DIY dryer vent cleaning, you’ll need basic home improvement tools, some experience using these tools (like a drill), and 1-2 hours to complete the process. Let’s go through these steps toward getting your dryer back to efficiency and more importantly, back to safety.
Step 1: Locate The Duct
To clean the duct, you’ll need to find it. Your standard exhaust duct is 4 inches in diameter and routes the exhaust from the dryer output all the way to the home’s exterior wall vent.
The longer the route from the appliance to the external outlet, the more length there will be to clean.
Step 2: Safely Disconnect the Dryer
For this step, you’ll need a screwdriver (usually a Phillips). Carefully pull the dryer away from the wall. If your dryer is gas-powered, be very careful not to disrupt the gas connection as a gas leak will cause a bigger problem.
Electric dryers are pretty straightforward to disconnect. You’ll simply unplug from the electrical outlet. Then you detach the exhaust pipe from the back of the dryer by loosening and removing the screws.
For gas dryers, you’d usually unplug the electrical cord, then wait about half an hour until you disconnect the gas. You’d want to make sure no more gas is still in the dryer before attempting to turn off and then disconnect the gas supply to the dryer. Consult your manual for gas dryer disconnection instructions.
Step 3: Clean, Clean, Clean
For this step, you’d use a dryer vent cleaning kit, a drill, and a vacuum cleaner (such as a shop vac). The kit should include an auger brush. You’ll need a brush to clear out the vent. For long vent pipes, you’ll most likely need an auger brush with extension attachments to clean the length of the pipe.
Next, go out to the external hood. If you have an exterior pest screen, you’ll clear out any debris from this first. Then you’ll either remove the hood by loosening the screws or clip the flap out of the way to keep it open.
You’ll use the vacuum to collect lint and debris as you brush it away. It helps to put the vacuum hose inside the exhaust path as you use the auger brush. With the auger brush connected to the drill and extensions, push it through the vent with the vacuum hose alongside it. Turn on the vacuum. Carefully run the drill in a clockwise direction moving the auger brush in a back and forth sweeping motion through the exhaust.
The idea is to sweep the vent as far in as you can with the vacuum collecting the debris. The vacuum may need to be emptied a few times during this process.
Step 4: Tidy Up, Reconnect Everything
Vacuum up any excess debris or lint both inside the utility room and at the outside hood.
Outside, you’ll reattach the vent hood (or unclip the flap) and reattach the exterior pest screen. Inside, reattach the vent piping to the back of the dryer, plug the dryer back into the electrical outlet, or carefully reattach the gas (if applicable).
If there is a soft foil-style vent connecting to the wall duct, consider replacing it with aluminum elbows as these hoses are a known fire risk.
Step 5: Do a Trial Run
Once everything is securely reconnected (with any necessary precautions for a gas dryer), it’s time to test it out.
Do a load of laundry. When it’s time to dry the clothes, make observations to ensure that things are running smoothly. Are the problems you had before still happening, like a burning smell, the dryer still running hot, or the clothes needing more than one pass to dry?
Next, check to see if the flap on the external hood is moving freely. This will indicate that there is a decent amount of airflow. If problems persist, it’s probably time to call a professional.
How Often Should Dryer Vents Be Cleaned?
- Daily: Clean out your dryer traps between each use.
- Monthly: Clear out any buildup any debris on the pest screen and external hood.
- Annually: Do a dryer duct cleaning once or twice a year depending on the amount of laundry. Large or multiple-family use may need up to three cleanings per year.
SERVPRO Is Ready to Help Fort Worth Residents With All Your Appliance Needs
Keeping vents clear allows your dryer to run efficiently and greatly reduces the risk of fire. With common home improvement tools and some elbow grease, you can usually clean out a clogged dryer vent on your own.
Remember to be careful with gas systems, and replace outdated soft foil-style vent material. Keep the venting path clear of anything lint could snag on and become attached to. The goal is to keep the vent clear of debris.
SERVPRO of North Richland Hills has seen hundreds of fire-damaged properties. While we’re honored to be the top choice for fire damage restoration in Fort Worth, we’d rather help prevent fires before they happen.
We can fix dryers and do a thorough cleaning of the venting, both for commercial and residential situations. We will inspect for any problems that need to be addressed so that all runs safely and smoothly. Call us at (817) 589-1499 anytime with appliance questions or for free pricing!